Relaunch?

It’s been a few years since I’ve posted anything on here and a lot has changed! Many trips have been had, been through a few vehicles and the partners in crime have changed! I’ve learned a lot, and changed a lot and perhaps this should be rebooted to reflect that!

Burke Mountain/Munro Lake

I know I was supposed to post more pictures from my trip to Macau and Hong Kong, but those can be put up quickly at any time!

Summer is in full bloom and I just completed my first over-nighter of the season!

Just as a brief intro, Burke Mountain is located in Coquitlam, BC and is home to many mountain biking trails as well as the Pinecone-Burke Provincial Park, More info can be found here: http://www.env.gov.bc.ca/bcparks/explore/parkpgs/pinecone/ HOWEVER, as a disclaimer, the maps and info on this website is fairly if not highly outdated. It is as if BC parks gave up on this park.

We first parked at the top of Harper Road, just across the orange gate to access the trails. Apart from a no campfires sign there is almost no indication that this is a provincial park, partially due to the construction that is going on.

Shortly after heading up the road, we met a fork, I pulled out my phone with pre-downloaded maps from Backcountry Navigator, and was approached by a couple who greeted us. We chatted briefly and they asked us where we were headed and they gave us directions on how to approach the Burke Summit Trail we were also warned of high waters that would result in the trail being impassable. We decided to proceed with their directions anyways and see where it would take us until we hit the first landmark, a green gate. They told us to head on the left trail of the gate but something seemed off. Left went down the mountain and right went up, again I consulted with my maps and chose to ignore their directions. LESSON #1: Local knowledge is NOT always good knowledge. We carried onwards towards the summit and came upon another lone hiker who said that we were on the right route and also consulted us on how to continue on to Munro Lake.

Image

Upon reaching the summit we had to decide whether to follow this man’s advice or to ignore it! We quickly scouted out our first option and choose to take the advice and head back down the mountain slightly. We saw a turn off that was not the turn off suggested by the man and decided to take it hoping to cut some time off our detour. Thanks to years of orienteering experience we were fortunate enough to cut directly into the old ski village on the mountain. Lesson #2: Pack a friggen compass!

ImageImage

As we continued on, the trail lead us to a bunch of mixed flagging tape that eventually lead us to a big orange signs with a canoe and Munro Lake written on it, so on we went. The straight line distance from the village is not all that far, but we quickly found out that distance is all relative.

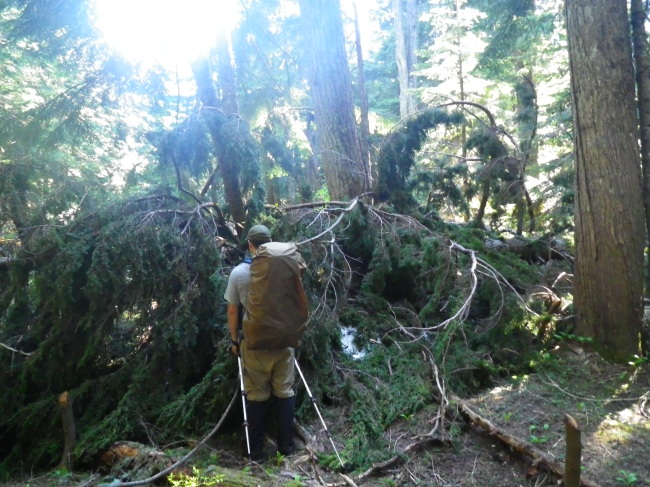
Our “trail” slowly became less of a trail and more of a constant bushwack; however, it was very well marked, like VERY WELL MARKED! There were signs that Rescue Teams have been in the area and that did not surprise us one bit. We carried on with this deadfall covered trail for 4 hours until we reached the lake. During the whole hike my shins were being knackered and I kept saying that I would throw on my gaiters and never did. By the time we reached the lake it was too late and my shins were a mess. Lesson #3: Just stop and make use of the gear you have, you will likely not regret it!

Image

Upon reaching the lake our first priority was shade, as the heat was only about to get worse and we really didn’t feel like being cooked alive. With a little bit of MacGyverism, we were able to erect a temporary sun shade to keep us out of direct exposure. Hiking poles, string and tarp resulted in the perfect fix. This, I feel, is the perfect example of why you standardize what you pack! You never know when certain bits and pieces become potentially life saving!

ImageImageImage

After dealing the sun we started up the stove had dinner and began settling in for the night. As the day went on we realized that the heat was a bit too much to bear and that the only thing we could do was rest. As a result, we used the Geigerrig hydration bladders we had filled with filtered lake water (via MSR Hyperflow) as a cold pillow and took a short nap. When the sun eventually stopped it’s assault, we tried to spend a bit of time outside. It was fairly unfortunate that the mosquitoes and bugs decided that we would not be spending any time outside exploring and called it a night. Tent up, sleep it out!

The return trip was more of the same, bushwack, bushwack, bushwack… and back to the truck we went. Glad we got off the mountain and happy we did the trip.Image

Would I recommend this hike to anyone? No…… Maybe…..

If you are like me and have a slight accident in your pants every time you lose the trail. Definitely NO! As well marked as the trail is, there is essentially no trail, no well worn path to comfort you. As a result of all the debris and downed trees, the flagging tape is just a guide and you will end up losing track of it many many times trying to find a detour around all the downed trees. The explanation I can think of is that God came to this trail, and toppled every 4th “big” tree and laid it directly over the trail. Just go check out the village and head home, there is nothing else for you there. I guess after ending the summer last year with such epic hikes, this one seemed much more of a downer in comparison.

If there is one thing I learned from this trip, It was to trust my instincts. It was my (our) instincts that got us out of trouble and help us make it to our final destination, yes people do have good insight, but at the end of the day, you know your skill level and abilities better than anyone else. When I didn’t listen to my gut, that was when I regretted it the most (gaiters!). We noticed that on many occasions, many things came naturally to us from years of backcountry experience. When we lost the trail marker, automatically we could set up a rendezvous point (last know marker) and conduct a search of the area. When we came upon a fork, we followed known destination bearings and followed our instincts instead of “poor” local knowledge… I’m sure all of these individuals meant well, but at the end of the day, mother nature as well as humans are constantly changing the terrain. You need to depend on yourself to get you where you want to go!

Image

Expedition to the Urban Jungle: A Trip Report of Macau with Photos Part 1!

Image

It has been a while since my last post and since then I have been in Macau (Macao), China. For those that don’t know of Macau, here comes a short history lesson. Macau is currently a special administrative region of China (the same goes with Hong Kong). It is run under separate rules and laws that are mostly based on Portuguese Laws. The reason behind this is because up until 1999, Macau was a Portuguese Colony. It first started as an area that Portugal rented from China. After a couple of centuries, and a drug war later, China signed things over to Portugal and the land was then governed by the Portuguese. This was the way it remained until a revolution where Macau residents became unhappy with the Portuguese government and protested.

During this protest, a few residents were shot and the Chinese government ended up having troops ready at the border ready to invade and reclaim the land. At this time, the Portuguese government apologized and offered to return the land back to China, but the Chinese government refused the offer and let the Portuguese government continue to govern it. This however triggered talks about whether Macau should be sovereign to the Portuguese or to the Chinese and resulted in an agreement that it was primarily a Chinese territory under temporary Portuguese rule. Finally they settled on returning sovereignty of Macau back to China in December 1999 and ever since it has been technically China, but still governed by Portuguese laws.

The last time I was in Macau was in 1996 and I have forgotten most of it. It has to be said that I was expecting a run down, not quite first world, type area with minimal luxuries except for those who were high ranking government officials. I was in for quite the surprise. Firstly I was greeted by the most friendly customs officer I have ever met! Since I was the last one through customs on that flight, him and I continued to chat about how I should renew my Macau identification card and all the benefits that came along with it.

As we caught a taxi to the place I would be staying at, I was shocked by the number of luxury cars and sports car that we passed. Given I was technically not in Macau, Macau, China, but Taipa, Macau, China, which is a small island attached to Macau itself.

Image

So what had happened since 1996 and 2013? … Casinos… There has always been Casinos in Macau, but there was an explosion of casinos since I was last there. The government became more receptive to large organizations opening mega casinos there and have been collecting signification amounts of tax from the casinos. It is currently known as the Las Vegas of the world and the casinos there make many times more than the casinos in Las Vegas. How much more you ask? Consider this. The income tax and property tax in Macau is minuscule, the majority of the government’s revenue comes from the casinos. The government gets so much money from them that they barely know what to do with it. They have been focusing on a few areas at the moment. land, recreation, and housing. Land is a problem in Macau. When I was born in Macau, Macau was approximately 16 square kilometers, today, it is at 30 and is still increasing. How does an island grow? You throw money into the ocean. No seriously, the government has literally thrown millions and billions of dollars into the ocean to “make” more land! With that they have also made more parks with fitness equipment focused at helping seniors stay more active. Above is a picture from the apartment I was staying at of the Taipa seawall. They are currently making a seawall with designated lanes for cyclists and pedestrians to use. Housing has been tackled by the government by creating subsidized housing all over Macau. High value land hasn’t stopped them. There is subsidized housing being built next to apartment complexes that are being sold for $6500MOP a square foot, while the government is selling their apartments for $1000MOP a square foot. On top of all this they are still giving money back to Macau citizens! They only thing they have yet to work out is a universal health care system but they have yet to find a model that works to model their system after, so they are just giving people money for health care instead until they can find a viable and efficient alternative.

So I called this trip an expedition, and you’re probably wondering why I did so! Firstly I did summit 3 different peaks!

Image

An old Portuguese Map of the Area

Image

The Lighthouse

Image

The Church

Image

And the Fortress

The next surprise I had was how the city was seemingly composed of polar opposites.

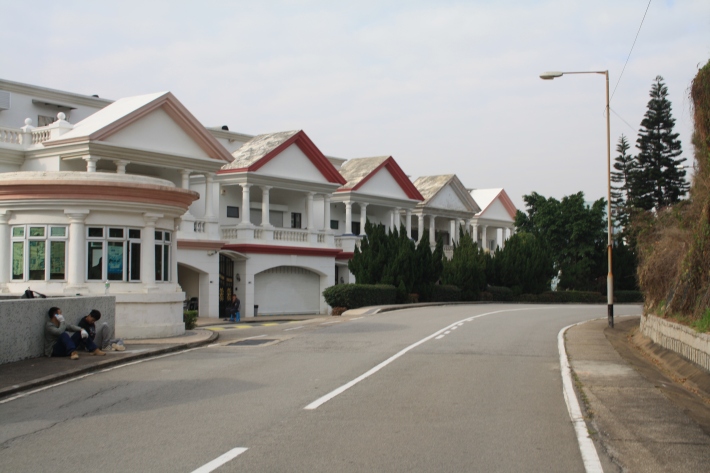
First we have the extremes in housing and architecture:

:Image

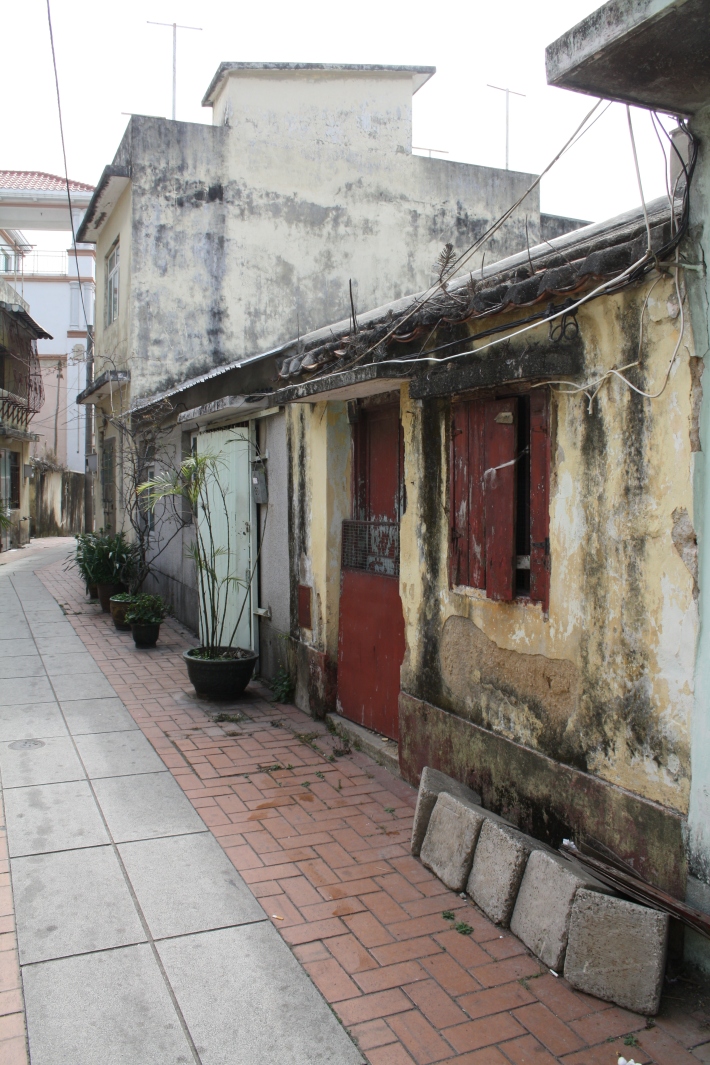
One of the older buildings in a village consisting of alleys.

Image

Image

some older buildings in the downtown area

– Compare that to –

Image

Some more pictures to come in Part 2!

Back to Basics Part 1

Disclaimer: This post may is strictly an opinionated piece! I am not in my late 60’s and harping on all ’em young’ns and their fancy technology!

Image

Just over the past couple of days, I was fortunate enough to get a couple of days off work to go enjoy the great blast of winter weather that we’ve had. Drive-in winter camping trips has become an annual tradition between myself and a few other close friends who are willing to brave the cold weather for a couple of days away, alone and disconnected.

This year the trip went slightly differently. Every year we faces minor set-backs but this year was different. We had to depart at night to accommodate my work schedule and the trip was quite spontaneous and the trip faced quite the setback! I’ll admit it, as shameful as it is, we got both of our vehicles stuck in 2 feet of snow! I thought that I would never say that I’ve gotten myself stuck in snow but there’s a first time for everything! I could blame it partially on the lack of visibility or the 45-50% tread left on my tires, but that would just be making excuses. To be completely blunt, I was stupid and by the time I realized my mistake it was too late. This resulted in us spending the first couple of hours of our trip attempting to free the vehicles.

When we set off on this trip, we decided that I would take lead. The error in this was that we didn’t check vehicle clearance heights. The lower clearance vehicle should have taken lead in case we faced clearance issues so that the higher clearance vehicle could pull the stuck vehicle out or in the worst case scenario, we would be able to bug-out with the one working vehicle. To compound the problem, the 2nd lower clearance vehicle didn’t wait for the 1st vehicle to give an all clear before entering (which was due to a lack of communication). This error resulted in my vehicle getting stuck in the deep snow, and the other being high centered on snow and ice. Even if I could get my vehicle out it would only go 75m before being blocked by the other decommissioned vehicle. So when do I start harping on all ’em technology junkies? Right now!

As we were trying to excavate our vehicles, I noticed that there was an over-dependence on technology and how they are supposed to aid you in various situations. First vehicle was a 1991 Isuzu Rodeo LS with the factory off-road package and the second was a 2008 Nissan Xterra again with the factory off-road package. These two vehicles are from completely different eras in terms of off-road vehicles. The Isuzu is a 5 spd manual, with 4 wheel drive (high and low) and auto locking differentials. There are no electronic driving aids (apart from ABS which clearly doesn’t work anymore) It is built simple and basic, no gimmicky gadgets to make life easy. The Nissan, had the same deal, but an automatic transmission, electronically controlled 4 wheel drive (high and low) and a electronic switch to lock the diffs. It also has a traction control system to manage wheel spin and traction loss on various surfaces. It was not until I was watching it struggle to get un-stuck did I realize all these fancy gadgets and top of the line tires did nothing to help it out of that mess it was in. It wasn’t until we employed some good old power on and off to get the vehicle rocking back and forth before we were able to get the Nissan free. We employed the same trick on the Isuzu and again, it worked like magic. Yes, it is a little bit more difficult to manual as I had to drop the clutch a bunch of times (while cringing) while feathering the throttle to manage the same effect.

In 17 years, the automotive industry has come a long ways in terms of developing technology that is designed to make automobiles safer, and more user friendly; however, these technologies will no compensate for stupidity. If we depended on the Xterra’s gadgetry to get us out of that mess that we got ourselves into, I would not be here writing this post today. We would have run out of gas from simply giving the car gas and hoping that all those fancy gadgets would be able to get itself out. We sometimes need to drop all faith in technology and revert back to the good old proven techniques to get us out of the 2 feet of doom that some people call snow.

Recently, there have been a lot of incidents of hikers, skiers, boarders, snowmobiles wandering into the back-country and getting lost. On multiple occasions, I was due to their over-dependence on technology that was designed and supposed to make their trip manageable and easy. But when their gadgets failed, so did they. This is why we need to go back to the basics, learn how to do things without electronic aids. We are slowly entering a generation where there is a decreasing number of individuals who don’t know how to read maps. “My GPS will tell me where to go!”, “My smartphone has the answer!”, they say, but all these things are battery based and extremely susceptible to the elements. When they fail, what will you do?  Why not learn how to use a map and compass, learn how to drive in the snow. learn how to setup natural shelters, just in case all those fancy gadgets fail. Yes, proper preparation and planning prevents piss poor performance, but if you prepare with an over dependency on technology it may result in poor performance because you didn’t learn how to do things properly in the first place. Technology should never be fully depended on, instead it should supplement your basic knowledge!

Pick a Pack!

Image

Picking the right backpack/rucksack is arguably one of the most important decisions you will make when buying gear for a trip. Over the past couple of months I was asked to help various people with packs and also just taught a class on how to pack your rucksack just last week. This lead me onto a realization that there are lots of horrible packs out there; horrible, in my personal opinion. I am no expert on packs but over the years I have learned a couple of things.

Above are two packs that I personally own; they are drastically different in a number of ways. Those of you that have been following me from the start will recall that the green one is a part of my day hiking pack, but the blue one is only seen by those who go on multi-day trips with me. The green one (Eberlestock Phantom) was $420CND and the (Tatonka Creek) was part of a Christmas Eve/Boxing Day special and was $99CND down from $200ish. Why would I take the cheaper pack over the expensive one?

The Eberlestock Phantom is a purpose built pack; however, it was designed for military use, in particular, scout sniper teams and urban SWAT precision shooters. It comes with a detachable scabbard for a rifle which I never have attached while on my day hikes, unless I am in grizzly country. It comes with many bells and whistles such as an internal organizer and shelving for calculators, scopes, radios and any other equipment a scout sniper would need or even a hunter; but this is no expedition pack. If you recall my previous post on what I have learned over my summer, you will recall that I found military gear is not always the best gear.

The Tatonka on the other hand, has been my primary pack for the past 10 years. Yes, it has lasted 10 years of neglect and abuse and is still an outstanding pack. Here are a few things I would recommend if hunting for a new pack (keep in mind that this is all my personal opinion):

1) Simplicity- look for a pack that is simple, the less straps, buckles, removable compartments and zippers it has, the lighter it will be. Yes, I may be pinching ounces here, but your pack is part of your base gear, and ounces here and there can add up! This doesn’t mean that you go out there looking for a pack with zero features. Look for one that looks clean and easy to use. If you find yourself digging through pockets, and saying “oh yeah! I can PROBABLY use that pouch for my sunglasses or multitool…” it is likely too complex. Say NO to bungee/shock cords on the external of the pack. Lets face it, bungees make packing easy, It may be tempting to buy a rucksack with bungee zig-zagging along the front of the pack but easy packing comes at a price. They are horrible for keeping things secure! I’ve seen my fair share of tents, air mattresses, sweaters fall out of these bungee fixings. They also have a tendency to get snagged on branches in heavy brush or even break! There are so many packs other there now with shotty bungee cord panels and lots of people fall into the trap of using it for attaching vital gear.

2) Ask yourself: How many days am I likely to go for? Most people will go for 3-5 days. With that, your base gear will take about 30L and then add approximately 10L for every additional day. For an example a three day trip would mean a 50L pack (30L + [2x10L] = 50L; sorry to my American readers, I don’t know the Imperial conversion). My Tatonka is a 50L pack with 10L of expandable space, and I have learned that sometimes smaller is better. With 60L of space you would imagine that I would run out of space really quick and you would be right. This will force you to pack smart! The first time I went up to Garibaldi Lake with this pack, I was able to fit 85lbs worth of gear in there; needless to say, that was an excessive amount of gear and I was able to do the same hike with 45lbs of gear in less than 1/3 of the time. An excessively large pack will also result in a bad packing job, because it is so easy to pack, you will tend to not pack it properly resulting in an unevenly balanced pack that will end up wrecking you halfway up the mountain!

3) Your body size: How large of a pack can you comfortably carry? If you have a 90L pack and are less than 120lbs, chances are the pack is going to hinder your mobility.  Are you still growing? If you are still growing you may want to look for a pack that will grow with you! Tatonka has a system that will allow you to adjust the pack from XS-XL (shown below), that is why it has lasted me 10 whole years!Image

3) Look for Durable Construction – look for a pack that has reinforced seams and tough zippers. There is nothing worse than having a zipper pull break, or a seam explode on you mid trip. Yes, it may be obvious that you want it to last a long time, but more importantly, many people forget that they tend to pack better at home than they do in the field. I find that many times, I end up over packing a certain compartment when I’m packing to come back down the mountain because I am in a rush to meet a certain timing. Another thing people forget about are the shoulder straps. I’ve noticed many new packs smaller than 65L have thin shoulder straps. Call me old fashion, but I like the thick beefy padded straps for when I do carry those heavy loads.

Must Have accessories!

1) Compression sacks: If you find you’re running out of space, these will make you space. Use these with caution though. When you compress them, they tend to make weird shapes and unbalance your pack. They can also contribute to you packing way too much!

2) Rain cover: On my last trip I tossed a rain cover on my pack not because it was raining. I did it to prevent the straps from getting caught on branches! Works like a charm and you have it in case it does rain.

3) Dry bags: If things take a turn for the worst, you’ll still have dry equipment! If you can find a Compression Dry bag that’s even better! Sea to Summit make a great one that come in different sizes. I keep my clothing in one on every trip, so if I fall through the ice on a trip or into water, I still have a full set of dry clothing.

If you need more info on pack sizing and fitting you can find it here: http://www.mec.ca/AST/ContentPrimary/Learn/Packs.jsp


BTW! I am currently collecting donations for Movember!

During November each year, Movember is responsible for the sprouting of moustaches on thousands of men’s faces, in Canada and around the world. With their “Mo’s”, these men raise vital funds and awareness for men’s health, specifically prostate cancer and male mental health initiatives. (Retrieved from http://ca.movember.com/about/, November 04, 2012) Please feel free to donate any amount to the link below! Remember every little bit helps!

https://www.movember.com/ca/donate/payment/member_id/2411642/

Top 4 Lessons Learned from Summer 2012

Top 4 Lessons Learned from Summer 2012

Being the last full day of Summer 2012 there are a number of various lessons I’ve learned this summer on various levels and they are as follows:

4) The best way to train for a hike, IS to hike. The most effective way I’ve found to practice and build endurance for long multi-day hikes is to replicate the situations and scenarios that you expect to encounter on the hike. For an example, If you are going on a multi-day hike, you are going to have a pack on you for the entire trip. Why not go on day hikes with a similar sized and weight pack? Go for a run with a pack. The more you do it, the more likely you will be able to know the limits of your body.

3) Military Clothing / Footwear SUCKS! Don’t get me wrong, I absolutely love military equipment. It’s strong, durable and simple. It’s designed to last, and that sometimes becomes a problem. Military gear, is usually heavy and takes up lots of space. There are many civilian alternatives that will out perform military apparel. I used to swear by military apparel and is slowly moving away from it. It first started with moisture wicking t-shirts that dried a much faster than a standard issue shirt, then it became rain gear, and now boots. I’ve almost halved the weight of my clothing simply by turning to civilian alternatives. There is still a place for military gear though and I will continue to use it when I go drive-in/car camping because a vehicle is carrying all the weight for me!

2) Taping your heels (taking care of your feet)! I don’t know why I never did this before, but near the end of this summer, I’ve started to put a small cross “+” of 3M medical tape right where my heels tend to blister. Ever since I’ve started to do that, I haven’t gotten a blister. I learned that the hard way after doing 50km on blistered heels over 3 days. At first blisters are only a slight annoyance, its a slight pain every once in a while when you bump it at just the right angle. Then it slowly becomes larger and starts to hurt every step. Then your mind gets used to the idea of the pain; however, what you don’t notice is that those little jolts of pain, slowly build up and start to drain you of energy, and morale which then leads to fatigue. There were multiple points at that hike where, I thought that I would have to turn back due to the level of fatigue. When you’re fatigued, you also don’t make the best decisions, you may make a wrong route choice which may then result in more serious injuries.

1) Who are you bringing on a hike? Good company on a hike is always awesome. There is nothing better than enjoying a few laughs while enjoying the amazing scenery. With that in mind, be mindful of who you are bringing along and what kind of hike it is. Is your hiking buddy a risk taker or always super conservative? How much experience do they have? Are they reliable and dependable? Will this all change when they are tired? As much as we all like to think that our friends are always reliable and dependable, sometimes you may find out that they are completely different animals when they are overwhelmed with fatigue. Every individual has a point where a switch goes off and they will no longer look out for the welfare of others in the group. The only way to learn more of your friends is to go on light hikes to find out how much of a risk taker they are and at what point will they become “not your friend”. Learn to know where your limits are, and learn the limits of your group.

The MUST KNOW knot!

If you’re an outdoor enthusiast, here is THE knot to learn! Learn to do it in your sleep! If I had to depend on one knot to save my life, it would be this one! There are snazzy one handed ways of tying it but this is the way I first learned to tie it!

The standing part forms “The Tree”
Form a loop (the “Rabbit hole”)
Form a second loop
Put the bitter end through the first loop. The rabbit hops out of the hole …
Goes around the tree …
And back down the hole
Tighten and you’re done

Retrieved from http://www.apparent-wind.com/knots/bowline/

Once you’ve mastered that, try this: http://www.youtube.com/watch?v=H85cMlvwwXA

Whats in that great big metal box?

Whats in that great big metal box?

As you may have figured out now, I enjoy the great outdoors; as such, I have a summer adventure vehicle that is insured only in the summer to allow me to venture into the wilderness. There is a large mortar box in the back that draws a little bit of attention.
Keep in mind that every time I head out into the wilderness, I will also have my ruck (https://rickyche.wordpress.com/2012/08/27/why-the-heck-is-your-pack-so-heavy/) with me that has additional equipment.

So here is the list of things in my Adventure Vehicle Survival Kit.

Left side (tools):
1) Small Hatchet
2) Folding shovel
3) Adjustable wrench
4) Needle nose pliers
5) Multi-bit screw driver
6) Torque wrench with various sized bits
7) Spark plug socket
8) Electrical Tape

Top Right
9) Comprehensive First Aid Kit
10) 2L Pot with lid
11) 4 Meals
12) Bottled water
13) Heavy Winter Jacket
14) Large Tarp

Bottom Right
15) Assorted bungees and string
16) Rope
17) 5000lb tow rope
18) Assorted signaling devices/ bear scares
19) 1L of motor oil (not shown)

This gear is to complement the existing gear that I have in my day pack. The reason I keep all of this in my vehicle is to allow me to stay the night with my vehicle and or assist another individual in need. When driving on backroads, it is entirely possible for weather to change drastically and cause unexpected delays such as a creek that drastically rises in height resulting in you being unable to drive across it. Weather systems in a valley can change very quickly and can be unpredictable (as I have recently seen in the Cariboo). It is also possible for you to face mechanical problems while on your trip.
Backroad conditions can vary and some may end up taking a toll on your car. The tools may be able to help you get your car running long enough to get you into civilization. Basic mechanical knowledge is a great asset to have when driving on backroads.
Lastly, sometimes you may encounter others that maybe in need of assistance. An extensive First Aid Kit and tow ropes will allow you to help others that may have been invovled in an accident on backroads. Accidents caused by wildlife and driver error are rare but do occur. It never hurts to be prepared for such an incident.

Adventure Tip of the Day!

Don’t you hate it when you’re hiking with a full ruck and slowly notice that your hiking boots have slowly started to become looser and looser with every step? Fear no more! I’ve been using this method to tie my laces and haven’t had any issues since!

Retrieved from: http://www.fieggen.com/shoelace/secureknot.htm

Step 1:
Ian's Secure Shoelace Knot diagram 1
Tie a Left-over-Right Starting Knot as shown, then make both laces into “loops” by simply doubling them back onto themselves. People often refer to these as “Bunny Ears”.
Step 2:
Ian's Secure Shoelace Knot diagram 2
Cross the two loops over each other so that the right (blue) loop ends up in front and the left (yellow) loop ends up behind. The yellow loop is now the right loop.
Step 3:
Ian's Secure Shoelace Knot diagram 3
Begin to wrap the right (yellow) loop around the left (blue) loop to end up in front.
Step 4:
Ian's Secure Shoelace Knot diagram 4
At the same time, begin to wrap the left (blue) loop around the back. You will end up with the ends of both loops on opposite sides of the “hole” in the middle.
Step 5:
Ian's Secure Shoelace Knot diagram 5
Feed both ends of the loops through the hole in the middle. The right (yellow) loop goes out the back and the left (blue) loop comes out the front.
Step 6:
Ian's Secure Shoelace Knot diagram 6
Now, simply pull the loops to tighten the knot. The whole twisted mess of the previous drawing will rearrange itself into a neat finished knot. Trust me, it works!